Image Source: Google
Are you looking to save space in your laundry room and make it more efficient? Installing a dryer wall box is a great solution to maximize space efficiency. In this ultimate guide, we will walk you through the steps to successfully install a dryer wall box in your home.
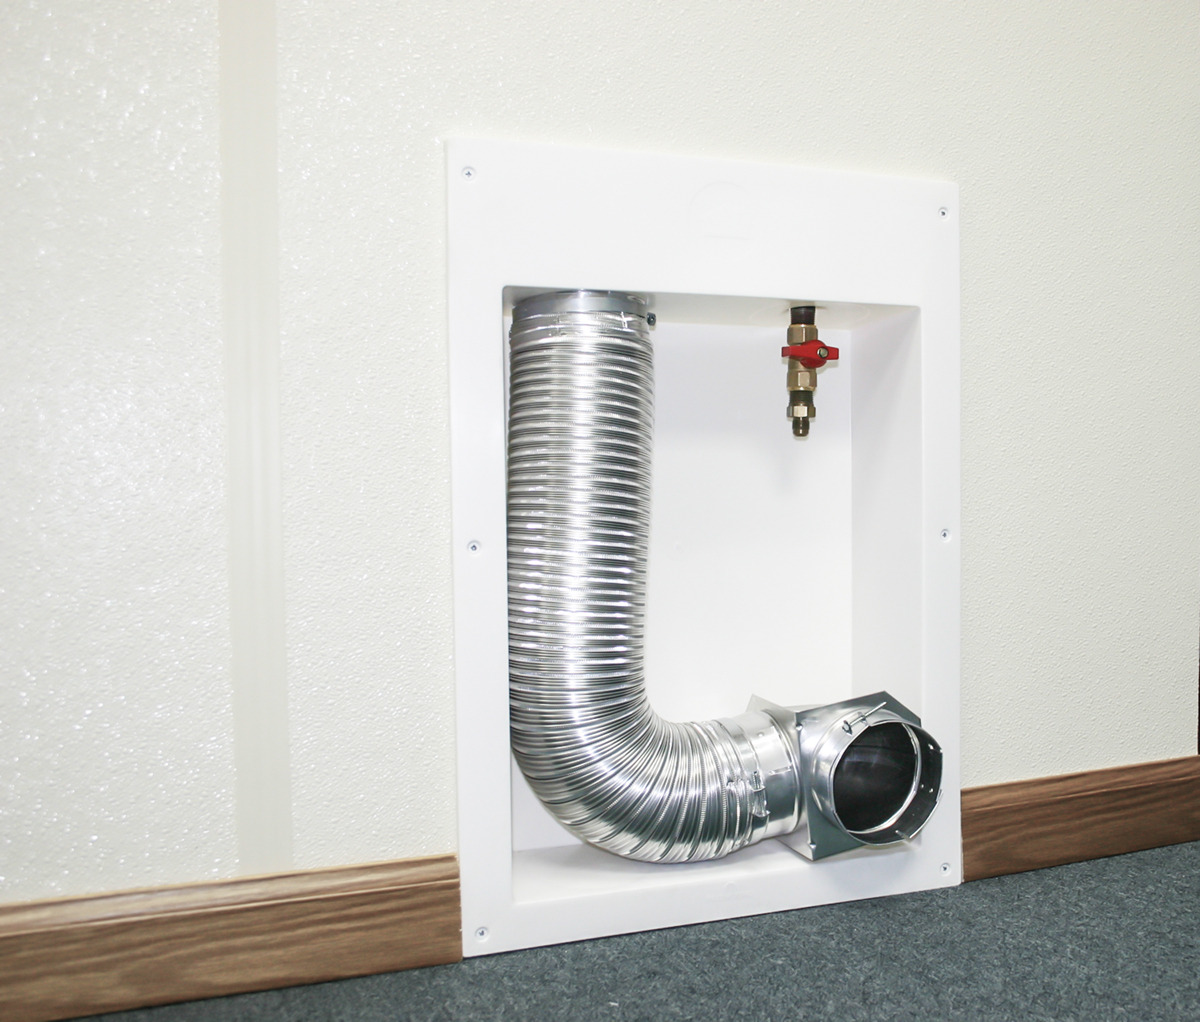
Why Install a Dryer Wall Box?
Before we dive into the installation process, let's first understand why installing a dryer wall box is beneficial:
Benefits:
- Maximizes space efficiency by recessing the dryer vent hose into the wall.
- Prevents the dryer from being pushed too close to the wall, reducing the risk of kinks or obstructions in the vent hose.
- Creates a clean and streamlined look in the laundry room.
- Allows for easier access to the vent hose for cleaning and maintenance.
Materials Needed
Before you start the installation process, make sure you have the following materials on hand:
Materials:
- Dryer wall box kit (includes box, trim ring, and mounting hardware)
- Drywall saw
- Screwdriver
- Tape measure
- Pencil
- Level
- Silicone caulk
- Pliers
- Safety glasses
Installation Steps
Now that you have all the necessary materials, follow these steps to install a dryer wall box:
Step 1: Prepare the Area
- Locate the ideal position for the dryer wall box on the wall behind the dryer.
- Ensure there are no obstructions such as wall studs or electrical wires in the chosen location.
Step 2: Mark the Cutout
- Place the dryer wall box against the wall in the desired position.
- Trace the outline of the box onto the wall using a pencil.
Step 3: Cut the Hole
- Use a drywall saw to carefully cut along the traced outline on the wall.
- Be cautious and wear safety glasses during this step.
Step 4: Install the Box
- Insert the dryer wall box into the hole in the wall.
- Secure the box in place using the provided mounting hardware.
Step 5: Apply Caulk
- Apply a bead of silicone caulk around the edges of the box to create a seal between the box and the wall.
Step 6: Attach the Trim Ring
- Place the trim ring over the dryer wall box to cover any gaps between the box and the wall.
- Secure the trim ring in place using screws or the provided attachment method.
Step 7: Connect the Dryer Vent Hose
- Connect the dryer vent hose to the outlet on the dryer wall box.
- Ensure the vent hose is properly secured to prevent any leaks or disconnections.
Maintenance Tips
Once you have successfully installed the dryer wall box, here are some maintenance tips to keep it in top condition:
Tips:
- Regularly clean the dryer vent hose and the inside of the wall box to prevent lint buildup and clogs.
- Check for any signs of wear or damage to the box or trim ring and repair or replace as needed.
- Inspect the seal around the box periodically and reapply caulk if necessary to maintain a tight seal.
Conclusion
Installing a dryer wall box is a simple yet effective way to maximize space efficiency in your laundry room. By following the steps outlined in this guide and implementing the maintenance tips provided, you can ensure that your dryer wall box functions properly and helps create a more organized and streamlined laundry space.